

Not so Healthy...
How to create a health barThis tutorial will cover the basics of creating a Health bar. A health bar is that visual representaion of just how close to death your game character is. This tutorial will show a method of creating that health bar for your own games.
Creating the new game project:
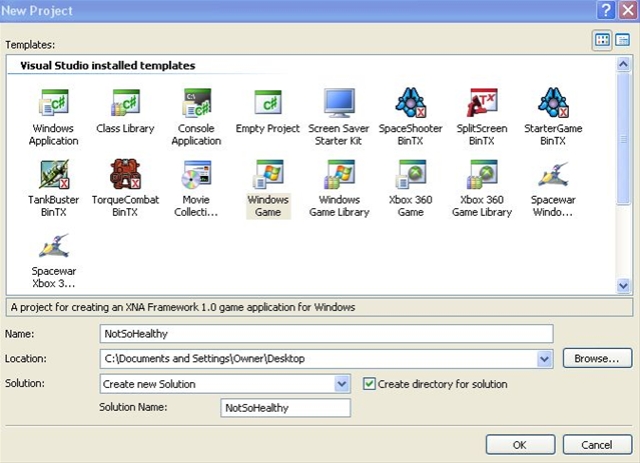
To start, first we need to create a new Windows Game Project. This can be done by launching XNA Game Studio Express and then selecting File -> New Project from the menu.
In the New Project window, select the "Windows Game" template and then give the project a name and choose a location to save your new game project.
Let stop here and do a quick build ![]() so we can show off the power of XNA and verify that the project was created correctly (and that your video card supports the minimum requirements for XNA).
so we can show off the power of XNA and verify that the project was created correctly (and that your video card supports the minimum requirements for XNA).
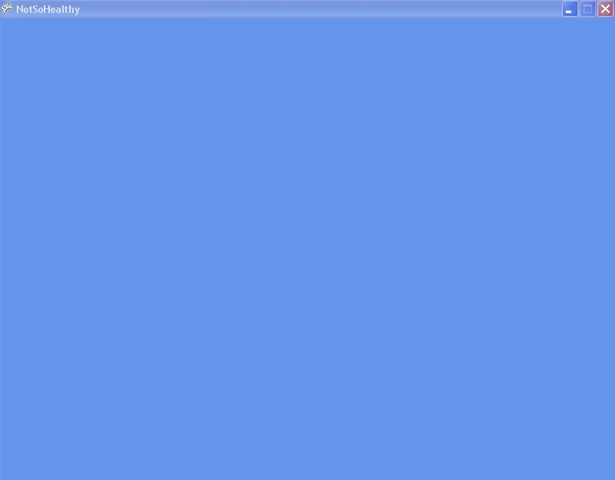
When you run the project, you should be greeted with a Cornflower blue window. If you are seeing this lovely shade of blue, then you have successfully created your new game project. (Isn't XNA amazing?)
If you have an error, then your video card most likely does not meet the minimum requirements for XNA. See the XNA FAQ from the Microsoft site for the minimum requirements and verify that your video card does meet those requirements. If you believe your video card does meet those requirements and are still getting an error, then I recommend you head on over to the MSDN XNA Forums and describe the error you are getting ask for some help there (you will probably see me around there, I find them to be a great place to hang out).
Adding the image:
Next, let's add the image to the project that we will use for drawing the Health bar. This image consists of a black rectangular outline and an off-white rectangular strip of color.

The black area inside of the rectangular outline is actually transparent, but the transparent area does not view properly when displayed in a web page.
The image is provided in the source file for this tutorial. Save the image to your project folder and we will next add it to the project itself.
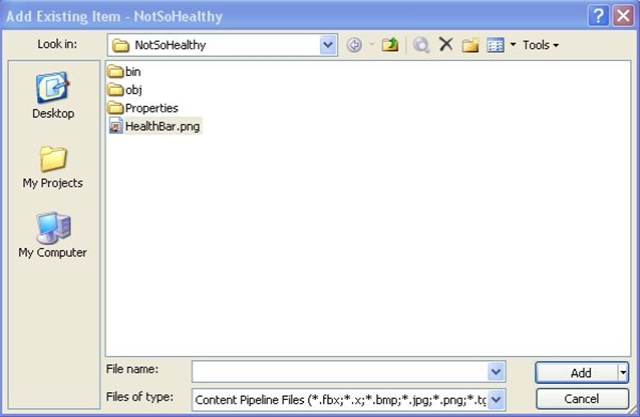
To add an image to a game project, right-click on the project name and select "Add -> Existing Item". This will then open the "Add Existing Item" dialog.
This dialog box defaults to show only Visual C# Files which mean you will not see any images until you change this. We want to use the Content Pipeline to manage our images so from the "Files of type:" combo box, select "Content Pipeline Files". Now you should be able to navigate to your image. Select the image and then click the "Add" button. You have now successfully added an image to your game project.
Drawing the Image:
We have created the game project and added our image, now let's write some code to draw that image on the screen. We sill start this by adding two new objects to the main game class (Game1.cs by default). These two objects will take care of storing and drawing the image in our game.
SpriteBatch mBatch;
Texture2D mHealthBar;
This "SpriteBatch" object is used to draw your images. The "Texture2D" object is used to store your images. Both of these types of objects are used very frequently when creating 2D games with XNA, so learning to use them and all that they can do becomes very important.
Now that we our objects, we need to initialize them and use them. To initialize the objects, we are going to add some code to the "LoadGraphicsContent" method that was automatically created for us when we selected the Windows Game template.
Add the following code to the "LoadGraphicsContent" method.
protected override void LoadGraphicsContent(bool loadAllContent)
{ if (loadAllContent) { // TODO: Load any ResourceManagementMode.Automatic content //Initialize the Sprite batchmBatch = new SpriteBatch(this.graphics.GraphicsDevice);
//Create the content manager to load the imagesContentManager aLoader = new ContentManager(this.Services);
//Load the HealthBar image from the disk into the Texture2D objectmHealthBar = aLoader.Load<Texture2D>("HealthBar") as Texture2D;
}
// TODO: Load any ResourceManagementMode.Manual content}
First, we initialized our SpriteBatch. If we had forgotten to initialize it, when we tried to use this object later, we would have gotten an error that "Object reference was not set to an instance of an object". When developing with objects, this becomes a fairly frequent error to see. Once you get it, you know that somewhere in your code you forgot to initialize an object.
Then we created a new object, a "ContentManager" object, to be used just within this method. The ContentManager object is used to load our images.
Finally, we used the newly created "ContentManager" object to load our "HealthBar" image and store it in our Texture2D object.
Now that we have initialized all of our objects, we can draw our health bar image on the screen. To actually draw the image to the screen, we will add some code to the "Draw" method. The "Draw" method is another one of the base methods that was automatically created for us when we made a new Windows Game project.
Add the following code to the "Draw" method.
protected override void Draw(GameTime gameTime)
{graphics.GraphicsDevice.Clear(Color.CornflowerBlue);
//TODO: Add your drawing code heremBatch.Begin();
//Draw the health for the health barmBatch.Draw(mHealthBar, new Rectangle(this.Window.ClientBounds.Width / 2 - mHealthBar.Width / 2,
30, mHealthBar.Width, 44), new Rectangle(0, 45, mHealthBar.Width, 44), Color.Red);
//Draw the box around the health barmBatch.Draw(mHealthBar, new Rectangle(this.Window.ClientBounds.Width / 2 - mHealthBar.Width / 2,
30, mHealthBar.Width, 44), new Rectangle(0, 0, mHealthBar.Width, 44), Color.White);mBatch.End();
base.Draw(gameTime);}
We start things off by using the SpriteBatch object and telling it we are reading to begin drawing things to the screen. Then we are going to draw the "health" for our health bar. To do that, we position it in the center of the screen and towards the top. We also only use part of our image. To display our health we only want to use the off-white retangular area so we "cut" that out of our original image and only display that. Then for effect, we color our image red to give us a red health bar.
The second item we are drawing is that rectangular outline. We are using that to place around our health bar just to give it a visual edge. We place that in the center of the screen towards the top as well. Then we again "cut" out just part of our original image to display. We do not give this image any shading and that is why was use the "Color.White" parameter. It tells the Sprite Batch to leave the original colors alone.
Finally, we tell the sprite batch that we are done drawing (mBatch.End();) and our Health Bar is now ready for it's big debut.
This would be a great time to do a quick build ![]() just to make sure that we have coded things correctly to this point and that our Health bar image is displaying as it should.
just to make sure that we have coded things correctly to this point and that our Health bar image is displaying as it should.
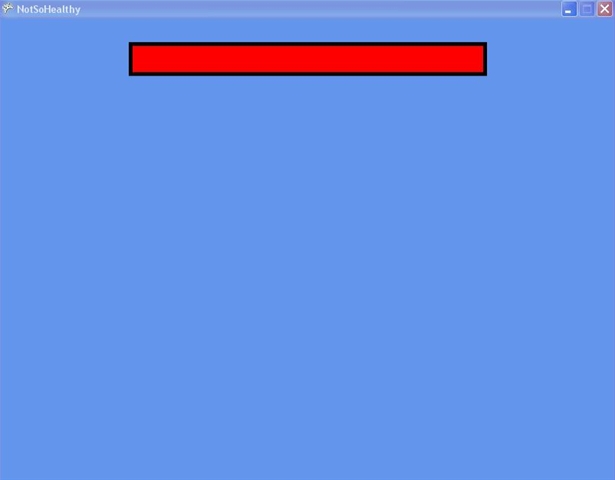
When you do a build you should see a screen like this one. Looking pretty healthy isn't it?
Keeping track of the Current Health:
We have a Health bar, but there does seem to be something missing. It seems that our game charactes would always be healthy if we just let things how they are. Yes, in order to add a sense of danger to our game, we definitely need a way to keep track of our heroes fading health.
Since we are not going to build a full game at this point, we will not only create a way to track the current health level, but we will also construct a way to increase and decrease the current health level through some keyboard input (since we do not have any enemies lurking about at this point).
To beging tracking the current health level, we will add a new object to the top of the main game class.
SpriteBatch mBatch;
Texture2D mHealthBar;
int mCurrentHealth = 100;
So right below the SpriteBatch and Texture2D objects, we have added a new object "mCurrentHealth" to track the current health level. We have also initialized this value to "100" indicating 100% healthy.
Now that we have an object to track the health. We now need to add some code to modify the health. Again, since we are not coding any enemies at this point, we will just add some code to the Update method to see if the Up or Down arrows have been pressed. If they have then we will increase or decrease the current health level accordingly. This will allow us to quickly and easily test that our health bar is working properly.
Add the following code to the Update method.
protected override void Update(GameTime gameTime)
{ // Allows the default game to exit on Xbox 360 and Windows if (GamePad.GetState(PlayerIndex.One).Buttons.Back == ButtonState.Pressed) this.Exit(); // TODO: Add your update logic here //Get the current keyboard state (which keys are currently pressed and released)KeyboardState mKeys = Keyboard.GetState();
//If the Up Arrow is pressed, increase the Health barif (mKeys.IsKeyDown(Keys.Up) == true)
{mCurrentHealth += 1;
}
//If the Down Arrowis pressed, decrease the Health barif (mKeys.IsKeyDown(Keys.Down) == true)
{mCurrentHealth -= 1;
}
//Force the health to remain between 0 and 100 mCurrentHealth = (int)MathHelper.Clamp(mCurrentHealth, 0, 100); base.Update(gameTime);}
We start things off by getting the current state of the keyboard. Getting the keyboard state let's us know which keys are currently pressed and released.
Next, we check to see if the Up arrow key is currently pressed, if it is, then we increase the current Health level by 1 (or 1%).
Then, we check to see if the Down arrow key is currently pressed, if it is, then we decrese the current Health level by 1 (or 1%).
Finally, we use a handy little MathHelper method to make sure that our current health level value stays between 0 and 100. MathHelper is a class with a lot of very useful Math methods to help you code your games. The one we are using here is called "Clamp". What the "Clamp" method does is keep an object within a given range for you. So in our above code, if "mCurrentHealth" dropped below 0, say -1, the clamp function would detect that and set it to 0 for us keeping us within our range at all times. Very useful.
Well, now that we are modifying the Health, we now need to modify our Draw code to show that changing Health level.
Add the following code to the Draw method.
protected override void Draw(GameTime gameTime)
{graphics.GraphicsDevice.Clear(Color.CornflowerBlue);
//TODO: Add your drawing code heremBatch.Begin();
//Draw the negative space for the health barmBatch.Draw(mHealthBar, new Rectangle(this.Window.ClientBounds.Width / 2 - mHealthBar.Width / 2,
30, mHealthBar.Width, 44), new Rectangle(0, 45, mHealthBar.Width, 44), Color.Gray);
//Draw the current health level based on the current HealthmBatch.Draw(mHealthBar, new Rectangle(this.Window.ClientBounds.Width / 2 - mHealthBar.Width / 2,
30, (int)(mHealthBar.Width * ((double)mCurrentHealth / 100)), 44),
new Rectangle(0, 45, mHealthBar.Width, 44), Color.Red); //Draw the box around the health barmBatch.Draw(mHealthBar, new Rectangle(this.Window.ClientBounds.Width / 2 - mHealthBar.Width / 2,
30, mHealthBar.Width, 44), new Rectangle(0, 0, mHealthBar.Width, 44), Color.White);
mBatch.End();
base.Draw(gameTime);}
We again are starting things off by signalling to the SpriteBatch that we are ready to begin drawing some things.
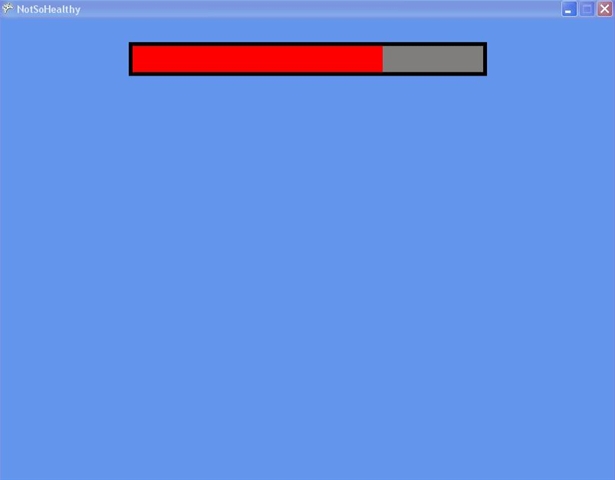
Next, we draw the "Negative" space for the health. This is to show how much health has been lost. To do this, we are just drawing a gray rectangly the full length of the health bar. When the health is entirely full, you cannot see any of the gray, but as health is lost, you can then begin to see the gray behind the health image.
Now, we draw the current health level. We achieve this by only drawing a percentage of the HealthBar image. We calculate that by taking the currenth health level dividing that by 100 and then multiplying that by the Width of the health bar image. (mHealthBar.Width * mCurrentHealth/100). That will give us the correct width to display for our current level of health.
Finally, we draw the rectangle again around our health bar just to make it look all pretty.
Well, that is it. We should now have a working health bar at this point. Let's do a final build and verify that we have it all working correctly. After you run the project, you should again be presented with the red full health bar. As you press the "Down" arrow key, the Health bar should decrease and as you press the "Up" arrow key the Health bar should increase.
Congratulations! You have completed the health bar tutorial. Now that you know the basics of how to create a health bar, can you think of some places where you might use it? Maybe in a 2D fighting game? Maybe for a fuel bar in a airplane or racing game?
Now take what you know and make something with it. Most of all, make sure that you are having fun!